Pages

Friday

Austrian Raspberry Shortbread ~


I love shortbread and this recipe is even lighter than any I have tried before.  After you make the shortbread, you roll it into  four long snake like logs and freeze it overnight.  Then when you want to bake a batch of them, you feed each log through the feed tube of your food processor to grate it.  This process makes the shortbread as light and airy.  You can use any flavor preserve you prefer, it doesn't need to be raspberry.  They are fabulous with apricot as well.  The recipe originated from Gale Gand, who is a wonderful pastry chef.  She was on the Food Network briefly and I used to  enjoy her show.

Prep the dough up to a month before and leave them in the freezer if you wish.  This makes a delicious and easy bar for the Holiday season or just any day you want a little treat.

Enjoy ~

Ingredients

  • 1 pound (4 sticks) butter softened at room temperature
  • 4 egg yolks
  • 2 cups granulated sugar
  • 4 cups all-purpose flour
  • 2 teaspoons baking powder
  • 1/4 teaspoon salt
  • 1 cup raspberry jam, at room temperature
  • 1/2 cup confectioners' sugar

Directions

In a mixer fitted with a paddle attachment (or using a hand mixer), cream the butter until soft and fluffy. Add the egg yolks and mix well.
 
In a medium bowl, stir together the granulated sugar, flour, baking powder, and salt. Add to the butter/egg yolk mixture and mix just until incorporated and the dough starts to come together. Turn the dough out onto a floured work surface and form into 2 balls. Wrap each ball in plastic wrap and freeze at least 2 hours or overnight, or as long as a month.
Preheat the oven to 350 degrees F.

Remove 1 ball of dough from the freezer and coarsely grate the frozen dough into the bottom of a 9 by 12-inch baking pan or a 10-inch tart pan with a removable bottom. Make sure the surface is covered evenly with shreds of dough. With a spoon or spatula, spread the jam over the surface, to within 1/2-inch of the edge all the way around. Remove the remaining dough from the freezer and coarsely grate it over the entire surface. Bake until light golden brown, 30 to 40 minutes. As soon as the shortbread comes out of the oven, dust with confectioners' sugar. Cool on a wire rack, then cut in the pan with a serrated knife.

Monday


Chocolate Dipped Macaroons ~

It's that time of year again, lots of baking around the house. 

I love anything with coconut in it, and add dark chocolate and it's a double yum for me.  These cookies are so good, it's almost dangerous to have in the house.  Mine went from the cooling rack into the freezer, just to make sure their safety for the Holidays.

And just so you know, these cookies are super easy to make.  One important criteria when I bake.  Enjoy ~


Adapted from Closet Cooking - my changes are marked with an *


Ingredients:
3 large egg whites
1 teaspoon vanilla extract
3/4 cup of sugar
3 cups sweetened shredded coconut
*1/8 tsp. kosher salt
2 ounces dark chocolate (shaved)* I used 6 ounces and melted it with a teaspoon of grapeseed oil in the microwave


Directions:
1. Mix the egg whites, vanilla, sugar, salt and coconut in a bowl.
2. Spoon the batter onto a parchment paper lined baking pan with 1 1/2 - 2 tablespoons of batter per cookie.
3. Bake in a preheated 350F oven until lightly golden brown, about 10-15 minutes.
4. Let cool for 20 minutes.

5. Meanwhile, melt the chocolate in a double boiler and dip the macaroons in the chocolate or drizzle the chocolate on the macaroons.  Place dipped cookies on a baking rack and refrigerate to store.  They also freeze wonderfully.


Christmas tree 2012. 


Wednesday

Organic Red Quinoa ~ Trader Joe's


I really love this product, it reaches all of my expectations.
Delicious, easy to make and low fat.  How great is that?  Well not that all of my recipes are low fat.  In fact, very few of them really are low fat.  But, quinoa is one of my go to sides when I want to keep down the calorie count and enjoy my meal. 

Trader Joe's Organic Red Quinoa is sold on the dry goods shelf.  Is there really a dry goods shelf any longer?  ;)   I must be dating myself.  Anyway, the directions say to add 1 cup of dried, rinsed quinoa to 2 cups of water.  I add a teaspoon of butter and a teaspoon of salt.  I also cut down on the water and only put in 1&1/2 cups.  Bring to a boil, place a lid on the pan and turn it to low.  It may say medium low, but either will do.  If after 15-20 minutes you have extra water in the pan just drain it and let sit on the stove with the burner turned off for about 15 minuts.  I added 2 stalks of fresh green onion and a quarter cup of chopped, fresh cilantro.  It's delicious, just yummy! 

Oh, I have no affliation with Trader Joe's either.  I am just a consumer who likes a good product and thought I'd share this one.


Give it a try and enjoy ~

Sunday

There are a few things I like about Winter ~


Roasting vegetables...  Endless possibilites and so easy.  Did I say delicious too?  Well, they are very.  The vegetables get carmelized, tender and sweet. 

Only 3 ingredients too.

Salt, pepper and olive oil.  Just be sure to have them about the same size in your roasting pan.  Preheat the oven to 450 degrees Farenheit.  Toss with salt, pepper and olive oil.  Place in the oven for 15 minutes.  Take the vegetables out of the oven and turn them over.  Place back in the oven for 15 minutes more.

And you get deliciousness every time.  See?  Oh how I adore fennel and potatoes together.... yum ~


Chinese broccoli... the leaves get nice and crispy too.


You can roast any vegetable you want or like, but the smaller the vegetable the less time in the oven.  Asparagus is about 10 minutes on one side and about 5 minutes on the second.  So adjust your time and you'll have perfectly easy and delicious vegetables. 

Yup, I like some things about Winter.....


Saturday

Lemongrass Coconut Noodle Soup w/ Cilantro Lime Oil ~


December 1st, brought us snow.  Not a storm, but just a messy, frigid day.  A nice day to stay inside and make soup for extra warmth.  I adapted this soup from The Little Fig.


8oz. of ,rice noodles, or thin vermicelli, cooked and drained, set aside.  Toss with a tablespoon of oil and set aside.

Make Cilantro Lime Oil and set aside, recipe below.

8 oz. of chopped mushrooms, I used cremini
2 large leeks, white and light green parts, sliced length wise and chopped
1 large stalk of lemongrass, woody parts discarded and chopped finely
1 can of coconut milk
1 jalepeno chili pepper, minced
3 cloves of garlic, minced
1/2 tsp. of ground cumin
1/4 tsp. ground coriander
4 cups of chicken stock, low sodium
1 tablespoon grapeseed or vegetable oil

In a large dutch oven, heat oil on medium.  Add leeks and cook for a couple of minutes, while stirring.  Add garlic, lemongrass, mushrooms, cumin, coriander, jalepeno and saute on medium for 2 minutes.  Stir.  Add coconut milk and chicken stock, bring to a boil.  Turn down and let simmer for 5 minutes.  Turn stovetop off and add cooked noodles, stir.  Ladle in bowls, drizzle with Cilantro Lime oil and serve.

Cilantro Lime Oil
1 bunch of cilantro, stems removed and chopped
1/2 cup grapeseed oil
1 lime, zested
1 tablespoon of kosher salt


Serves 4 nicely.  Other than chopping, this is a very easy soup.  Very mild flavors.


Enjoy ~


Sunday

Greek Lamb and Orzo ~


I went to D.C., recently and had a wonderful time.  Full with friends, woderful sights and delightful food.

One of the things I did was go on a "walking tour" of the Capitol area and it included small meals at three restaurants.  We walked for four hours and stopped in between some great sights.  If you get the chance, take a walking tour of any place you visit, it's a great way to see some of the out of the way places.  And one of the restaurants was Greek, we had a version of this dish there.  It was wonderful, so I wanted to create it when I came home.

First of all, this dish is traditionally baked in the oven along with a leg of lamb, fresh tomatoes and orzo thrown in at the end.  What a fabulous combination too, so yummy.

I don't make huge meals any longer, the kids are all grown and on their own.  So I googled some recipes and I found one that uses ground lamb and done on the stove top. 

Here is the recipe I found, although I adapted it a bit.  It's from The Daily Meal.

1 pound ground lamb
  • Two 14 ½-ounce cans whole peeled tomatoes, juices reserved (I used diced)
  • 1 cup water (I used the reserved juice from the diced tomatoes)
  • 3 cups uncooked orzo pasta (I used 1&1/2 cups)
  • 2 stalks celery, cut into ½-inch pieces
  • 1 medium onion, chopped
  • 2/3 teaspoon allspice
  • 1 teaspoon salt
  • 2 teaspoons cayenne (this was too hot, please use 1/2 tsp.)
  • 3 bay leaves
  • 3 teaspoons dried oregano (I used 1 tsp.)
  • 2 cloves garlic, minced (I used 3)
  • DIRECTIONS

    Heat a large saucepan over medium-high heat. Stir in the lamb, breaking it up into crumbles, and cook until browned (with no visible pink).  (I removed the lamb to a bowl and set aside)
     
    In the same pan, stir in the tomatoes and their juice, water, orzo, celery, onion, allspice, salt, cayenne, bay leaves, oregano, and garlic. Bring the mix to a boil. (I sauteed the onion, celery and garlic for 5 minutes first)
     
    Reduce the heat to medium low, cover, and simmer, stirring occasionally, until the orzo is tender and has absorbed the liquid from the tomatoes and extra water — about 15 minutes. Combine with the cooked lamb and serve. (After 5 minutes on medium low, I stirred it and it was getting dry on the bottom of the pan, so I shut the stove off and just let it finish, stirring a couple of times.) 
     
    Add lamb back into pan and stir.  Serve with feta or grated cheese.

    Recipe Details

    Prep time: 5 minutes
    Cooking time: 20 minutes
    Total time: 25 minutes
    Serves four (plus some very delicious leftovers).
     
     
    We also went to a great Thai restaurant for lunch one day and one of the dishes we had was Basil Fried Rice.  It was so, so good....
    I think I'll google this one next to try....


    Saturday

    Mario Batali's tweet on Potato Gnocchi ~


    "Starchy russets 1lb per 100gms flour/1 egg- boil spuds, rice, then barely mix. RT. : Hi Chef, any tips for making gnocchi?"  Great advice Mario...
    you should know, you must have made thousands, if not millions of gnocchi.  So, I tried your version.  Perfect, thank you ~

    And just when the dough comes together, roll into a ball.  Divide into fourths and roll each forth into logs.  Cut the dough into one inch pieces and roll over the top of a fork, pressing gently.


    Place each gnocchi on a sheet pan, sprinkled with a little cornmeal.


    Fill a large pot of water and bring to a boil, add a heaping tablespoon of salt.  Add gnocchi while gently stirring (they will sink).  When the float to the top, scoop out with a slotted spoon.  

    Toss with 1/2 cup of prepared pesto, sprinkle with parmesan cheese and serve. 

    Nigella Lawson really is a Domestic Goddess ~


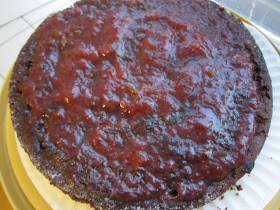
    If you haven't had her Chocolate Cloud Cake, please add it to your list.  It's heavenly, decadent and most of all very easy to make.  Your guests will ooh and aah over this one and you haven't even slaved in the kitchen over it!  Nigella rocks with this one.  She really is a domestic goddess, really.....

    Be forewarned, serve in thin slices.  You can always go back for seconds.

    When you take the cake out of the oven, it will sink.  But don't despair, this is the space to add all of the luscious whipped cream "cloud" on.  And don't forget to give it a good dusting of cocoa powder.  Yum is all I am going to say.


    Nigella's Chocolate Cloud Cake ~

    For the cake

    • 9 oz (ounce) dark chocolate (minimum 70% cocoa solids)
    • 4 oz (ounce) unsalted butter (softened)
    • 6 medium egg(s) (4 separated)
    • 6 oz (ounce) caster sugar
    • 2 tablespoon(s) Cointreau (optional)
    • 1 zest of Oranges (optional)

    For the cream topping

    • 17.55 fl oz (fluid ounces) double cream
    • 1 teaspoon(s) vanilla extract
    • 1 tablespoon(s) Cointreau (optional)
    • ½ teaspoon(s) cocoa powder (unsweetened) for sprinkling

    Barbeque Chicken, Cheese and Corn Chowder ~


    Barbeque, barbecue, bbq..... it's all good!

    I've been playing around with different flavors in corn chowder for a while now and I think I've finally hit a home run.  My youngest son loves corn chowder and so I've been on a quest to combine all of his favorite flavors.  So this chowder fits the bill.  It's smokey, with bacon and barbequed chicken too.  It's nice and cheesy with a whole pound of cheddar cheese and it has a little kick with cayenne pepper.  Creamy, cheesy and barbeque...... what's not to love.

    So if you like all of these flavors, you'll love this soup.

    Barbeque Chicken, Cheese and Corn Chowder

    1/2 pound uncooked bacon, diced
    1 large Spanish onion, peeled and diced

    1 large red pepper, diced
    3 carrots, peeled and diced
    3 ribs celery, diced
    3 cloves garlic, minced
    5 medium yukon gold potatoes, diced into 1/2 inch cubest
    6 cups chicken stock
    1/4 teaspoon ground cayenne pepper
    2 teaspoons ground coriander
    2 cans (16 ounces each) whole kernel corn, drained
    2 cans (16 ounces each) creamed corn
    1 pound (16 ounces) sharp cheddar cheese, grated
    2 cups of light cream

    Kosher salt and freshly ground black pepper (to taste)

    1 breast of chicken with skin and bone in, baked with 1/2 cup of good store bought barbeque sauce.  I used Hickory Flavored.

    Turn oven on to 350 degrees F. and bake chicken uncovered for 55 minutes.  Remove from
    oven, let cool, remove skin and bone, shred meat.  Set aside.


    Heat a stockpot over medium-high heat and add the bacon. Cook the bacon until brown and crispy. Remove the bacon from the pot and set aside on paper towels to drain.  Dice bacon finely.

    Discard all but 2 tablespoons of the bacon drippings. Add the onion, carrots, celery, red pepper, and garlic to the drippings and saute for 5 minutes.

    Add the potatoes, stock, cayenne pepper, and coriander. Bring to a boil. Reduce the heat to medium and simmer for 20 minutes.

    Add the whole kernel corn, creamed corn, cheese, and cream. Simmer an additional 7 minutes.
    Add the shredded chicken and cooked bacon, stir and let sit for 10 minutes.  Stir, taste and add salt and freshly ground pepper if needed.


    Serve with a nice, crusty bread.  Enjoy ~


    Thursday

    A perfect Chocolate Cake ~


    I love a good chocolate cake, but really don't like frosting at all.  To me, it makes any cake too sweet.  I decided to make this cake with chocolate whipped cream and strawberries, similar to strawberry short cake.  But I mascerated half of the fresh strawberries with a couple of tablespoons of strawberry preserves, because it's not summer and strawberries aren't in season. 

    It worked perfectly and this cake was moist and delicious.  The chocolate whipped cream was heavenly.  And even better, this dessert was so, so easy.  The cake mixes in one bowl, gotta love that.  I froze the cakes after they cooled and saved it for a time when I wanted a special dessert.  Hersey's named this the Perfect Chocolate Cake, and I wholeheartedly agree.

    The directions for the strawberries and whipped cream are below.
    Hersey's Perfect Chocolate Cake
    • 2 cups sugar
    • 1-3/4 cups all-purpose flour
    • 3/4 cup HERSHEY'S Cocoa
    • 1-1/2 teaspoons baking powder
    • 1-1/2 teaspoons baking soda
    • 1 teaspoon salt
    • 2 eggs
    • 1 cupmilk
    • 1/2 cupvegetable oil
    • 2 teaspoonsvanilla extract
    • 1 cup boiling water
     

    Directions

    1. Heat oven to 350°F. Grease and flour two 9-inch round baking pans.
    2. Stir together sugar, flour, cocoa, baking powder, baking soda and salt in large bowl. Add eggs, milk, oil and vanilla; beat on medium speed of mixer 2 minutes. Stir in boiling water (batter will be thin). Pour batter into prepared pans.
    3. Bake 30 to 35 minutes or until wooden pick inserted in center comes out clean. Cool 10 minutes; remove from pans to wire racks. Cool completely. 10 to 12 servings.

      VARIATIONS:
      ONE-PAN CAKE: Grease and flour 13x9x2-inch baking pan. Heat oven to 350° F. Pour batter into prepared pan. Bake 35 to 40 minutes. Cool completely. Frost.

      THREE LAYER CAKE: Grease and flour three 8-inch round baking pans. Heat oven to 350°F. Pour batter into prepared pans. Bake 30 to 35 minutes. Cool 10 minutes; remove from pans to wire racks. Cool completely. Frost.

      BUNDT CAKE: Grease and flour 12-cup Bundt pan. Heat oven to 350°F. Pour batter into prepared pan. Bake 50 to 55 minutes. Cool 15 minutes; remove from pan to wire rack. Cool completely. Frost.

      CUPCAKES: Line muffin cups (2-1/2 inches in diameter) with paper bake cups. Heat oven to 350°F. Fill cups 2/3 full with batter. Bake 22 to 25 minutes. Cool completely. Frost. About 30 cupcakes.
    Strawberries:

    1 quart of fresh strawberries, washed.
    2 Tablespoons strawberry preserves
    2 Tablespoons water

    Set aside 4 large, ripe strawberries.  Cut in half lengthwise, leave the steam attached.
    In a heavy bottom sauce pan, heat all ingredients to a low simmer.  Let cook down until nice and syrup-y. Stir, so it doesn't burn, about 5 minutes.  Let cool and set aside.  Or do as I did and cool to refrigerate.

    Chocolate Whipped Cream:

    2 cups of heavy whipping cream (cold)
    1/2 t. vanilla
    1/2 t. salt (I just used a pinch of kosher)
    3 Tablespoons granulated sugar
    3 Talespoons of cocoa powder

    I used a stand mixer, but you can use a hand mixer as well.
    Put bowl and whisk attachment in freezer for 30 minutes.

    In a small bowl mix together cocoa powder, sugar and salt.
    Add a couple of tablespoons of cream and hand whisk everything to a paste.

    Remove bowl and whisk attachments from freezer. Add cream, vanilla and cocoa paste.  Turn on low for about 30 seconds, then turn to medium for another 30 seconds.  Next, turn on high for a minute.  Check to see if your peaks are starting to form by lifting the whisk out of the cream mixture.  Whipped cream takes about 2-3 minutes to get to the stiff peak stage, so watch it carefully.  You can even stop the machine and hand whisk the cream until stiff peaks.

    To assemble:

    Brush you cakes of crumbs and place on plate to serve.  Spread the strawberries mixture on the top right up to the edges.


    Next, add half of the whipped cream in the center of the cake and spread out to the edges as well.


    Place second cake on top of the whipped cream and top with the rest of the whipped cream.  Take the fresh halved strawberries and decorate the top.
     
     
    Place cake in refrigerator until ready to serve.   This cake is absolutely yummy....  Enjoy ~


    Sunday

    Dragon Fruit ~ at your local Asian Market....


    This very pretty and delicious fruit is Native to Mexico, Central, South America and Southeast Asia. Taste: Drago fruit can be described as a cross between a strawberry and a pear. Its delicious red berry flavor can be enjoyed all by itself, infused with vodka or on top of any luscious dessert.

    If you are looking for fruits that are filling and delicious, but will help keep your weight in check, dragon fruit is a perfect choice. A 100g serving of dragonfruit has only 60 calories.


    Cut it in half length wise and see how gorgeous it is inside.

    Run a small paring knife or spoon around the outer edge and into the bottom edges and the fruit will slide out beautifully.

    And for a real wow factor.  Dice it up and place it back in it's own natural bowl.  Just beautiful, served all on it's own as a first course, even add a splash of light rum, vodka or pear brandy.   I just love how Mother Nature outshines itself.  Look at the beauty.....


    This little gem is available from late June until December in Asian Markets.  And when you are choosing your dragon fruit, do so like an avocado.  They should be firm, with a little give to them when held in your palm.  A half of each makes one delicious serving.

    Enjoy ~


    Thursday

    Not your Yia Yia's Avgelomo soup ~


    I love Avgelomo soup, it's fresh and delicious.  The original is made with lemon, chicken stock, eggs and rice or orzo pasta.  And while I love the flavor, I find that it really wasn't a meal for me.  I, of course want to change it to well, a meal... So, I did.  With the addition of grated carrots, chopped spinach and roasted chicken breast, it really makes it special.  All in all, it takes about 30 minutes and it's ready.  To make it an easy week night meal, roast your chicken breasts the night before and shred them while you prepare the soup.

    Also remember not to let the soup come to a boil, because the eggs will curdle.  And then you would have egg drop soup and that's a different soup altogether....   Oh, I love the creaminess of this lovely soup, and all because of the addition of eggs.  Who knew?

    Give this soup a try, you won't be sorry.  Trust me.

    Ingredients:

    2 cups of grated carrots (box grated)
    1lb. of baby spinach, chopped
    2 eggs, whisked until foamy
    2 whole lemons, juiced
    2 cups of shredded, cooked chicken breast
    8 cups of chicken stock
    12 oz. of orzo pasta, cooked and set aside
    salt
    pepper


    Bring the chicken stock to a simmer on the stove top, on medium heat.  Add the grated carrots and cook on low for about 10-15 minutes.  Add spinach, stir and cook for about 10 minutes.  Add your chicken, stir and remove from heat.

    In a separate bowl, whisk eggs until foamy, about 1 minute.  Remove a ladle full of soup from the pot and put in a measuring cup with a spout.  While whisking your eggs, slowly add the soup into the bowl with the eggs to temper.  Now, slowly add your egg mixture to your soup, whisking while you pour a steady stream.  Taste and adjust your seasonings.  Add orzo into soup and stir. Pour lemon juice into soup and stir. 


    Sunday

    Time to bake ~ Chcolate Banana Cake


    Along with the Fall, comes the wind and sometimes the rain.
     
    Yesterday afternoon, the weather turned windy and rainy.  A perfect time to bake.  One of my favorite cakes is this easy, chocolate, banana one.  I always have leftover ripened bananas.  And when they get to that stage, I either bake with them or throw them in my freezer, peels and all for later baking.
     
    I made this cake in my loaf pan, it's moist and delicious.  Give it a try, you won't be disappointed.... I promise. 


    Chocolate Banana Cake - Adapted from Tish Boyle


    Makes one 9 X 5 inch loaf or a 9 inch round (serves 8-10)


    1 1/4 cups all-purpose flour
    1/4 cup unsweetened cocoa powder
    1 teaspoon baking soda
    1/4 teaspoon salt
    1/2 cup (1 stick) unsalted butter, softened
    1 cup granulated sugar
    2 large eggs
    1 1/3 cups mashed ripe bananas (about 3 medium)
    1 teaspoon vanilla extract
    1/2 cup sour cream

    4 oz bittersweet chocolate, finely chopped

    Position a rack in the center of the oven and preheat oven to 350. Grease bottom and sides of 9 X 5 inch loaf pan or 9 inch round pan.

    Sift together flour, coca powder, baking soda, and salt into a medium bowl. Set aside.

    In the bowl of an electric mixer, using paddle attachment beat butter at medium speed until creamy, about 1 minutes. Gradually beat in the sugar and beat at high until well blended, about 2 minutes. At medium speed, beat in the eggs one at a time, beating well after each addition and scraping down the sides of the bowl as necessary. Add the mashed bananas and vanilla extract and mix at low speed until blended. Add the flour mixture at low speed in three additions, alternating it with the sour cream in two additions. Remove bowl from the mixer stand and stir in the chopped chocolate. Scrape batter into the prepared pan and smooth top with spatula.

    Bake cake for 55 to 65 minutes (loaf pan) or 45 to 50 minutes (round pan), until a cake tester into the center comes out clean (except for any melted chocolate.)
    Cool the cake in the pan on a wire rack for 15 minutes.


    Soup makes the World a better place ~


    Wouldn't you agree?  Well, I do.  I love soup, it's so comforting and delicious.  And look at this picture, it's so pretty too.  After all, they say we eat with our eyes first....    This is my most favorite vegetable soup, lots of fresh and hearty vegetables.  It's a perfect lunch or dinner with a nice crusty piece of bread.  The cool and damp days or nights that have you craving some warmth and comfort.   This could be your favorite dish too.

    This soup is easy to make, you just have to patiently chop all of your vegetables to a really to a small dice and then your pretty much done.  Simple, no?  And who doesn't love the smell of homemade soup simmering on the stove in the fall?

    Here are the ingredients:

    Nothing exotic here, you'll find all of the ingredients at your grocery store.


    3 large carrots, sliced


    3 large celery ribs, sliced

    1 large onion, sliced or diced (I don't fuss much)

    1/2 head of green cabbage, sliced and chopped

    1/2 of a yellow turnip, diced

    1 head of Escarole, washed, sliced and diced

    8 cups of good chicken stock

    2 tablespoons of olive oil

    2 cloves of garlic cloves, minced

    1 cup of cooked, small pasta (I use arancini)


    2 bay leaves
    1 pinch of red pepper flakes
    1 teaspoon of black pepper
    2 teaspoons of kosher salt
    grated cheese, for serving


    In a large stockpot on top of stove, turn heat to medium.  Add olive oil and heat for a minute.  Add chopped onion and cook for a minute or two by itself.  Add carrot, celery and turnip.  Sprinkle with a teaspoon of Kosher salt.  Let sweat for about 5 to 10 minutes.  Add cabbage and garlic, cook for another minute.  Add your stock and bring to a simmer.  Add the bay, red pepper flakes, another teaspoon of salt and last but not least, black pepper.
    Place cover askew, turn on low and let simmer for about 15 minutes.


    And now add the "piece de resistance".  A gorgeous head of chopped and diced escarole, which I believe makes soup come alive.  Just look.


    Don't be afraid to add the whole thing, it cooks down.  Escarole has a bite to it, which balances out the sweetness of the onion and carrot.  I love it!

    I do have a pet peeve about one thing.  I never add my pasta to a soup before I am serving it.  If you add the pasta beforehand, it will eat up all of your delicious broth and you don't want that to happen.  So, cook the pasta separately.  And serve this soup with a sprinkle of freshly grated Parmesan cheese.  You'll be happy, I promise. 

    Enjoy ~


    Saturday

    I'm not ready to say goodbye... to Summer that is ~


    Sigh...


    Tuesday

    In a different light...

     
    I made a second batch of this Curried Vegetable soup for friends who are having their kitchen remodeled.
     
     
    The sun was shining and streaming through my window.  So I put the dish on my windowsill and captured this shot.   I don't have any enhanced photo programs or even any special lighting.  I can see why people use those type of programs, because you must be able to create a picture like this all the time.  But, I have to say that there is something very special about capturing perfect lighting from Mother Nature.  Don't you agree?

    Here's my first pot of soup, made on a grim, dark afternoon.  Sure doesn't look as pretty as the dish I made today, even though it's the same exact recipe.

    Not so perfect lighting....


    Oh, the soup is very delicious.  Scroll down if you would like the recipe and so, so easy.

    Sunday

    Salted Toffee-Chocolate Squares - Martha Stewart

    I needed a quick dessert to take to an impromtu family party and this fit my time-squeezed schedule well.

    It's one of those easy desserts that starts with graham cracker squares on the bottom, much like those much loved Magic Bars from the 80's.  This starts with layering graham crackers on a baking sheet, topping with toffee bits, chopped almonds and melted butter.  A quick trip in the oven for 10 minutes or so, then add chopped chocolate and a little salt and voila, done! 

    And the best part?  Everyone loved them and oohed and aahed over them.    Thanks Martha~


    14 graham crackers
  • 1 bag (8 ounces) toffee bits
  • 1 1/2 cups coarsely chopped toasted natural almonds
  • 1/2 cup sugar
  • 1 cup (2 sticks) unsalted butter
  • 3/4 cup (4 ounces) bittersweet chocolate, chopped, or chocolate chips
  • 3/4 teaspoon coarse salt

  • Directions

    1. Preheat oven to 350. Line a rimmed baking sheet with foil. Place graham crackers in a single layer on sheet, edges touching. Sprinkle toffee bits and almonds over graham crackers.
    2. In a small saucepan, bring sugar and butter to a boil over medium-high. Reduce heat and cook at a rapid simmer, swirling pan occasionally, until mixture is syrupy, 2 minutes. Immediately pour over graham crackers. Bake until sugar topping is bubbling, 12 minutes. Remove from oven and immediately sprinkle chocolate and salt over graham crackers. With a sharp knife or pizza cutter, cut into 2-inch squares. Let cool completely on sheet on a wire rack. (Store in an airtight container, up to 1 week.


  • Pla


  • Shrimp C

  • ...